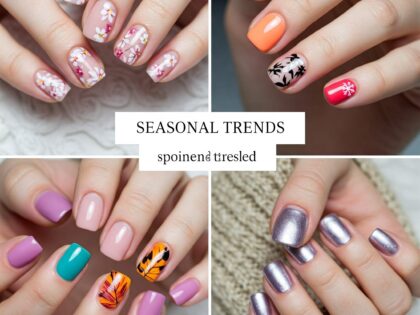
DIY Nail Art Tutorials: Creative Looks You Can Do at Home

Nail art is one of the most fun and expressive beauty trends—and the best part is, you don’t need a salon to get gorgeous, unique nails. With the right tools and a little patience, you can create stunning nail art right at home.
This guide features easy, beginner-friendly designs, essential tools, and pro tips to help you get started.
Key Takeaways
- DIY nail art is fun, affordable, and customizable
- Start with simple designs and build your skill
- Good prep = longer-lasting results
- You don’t need fancy tools to get creative
- Practice makes perfect
1. Nail Art Essentials: What You’ll Need
Before you start designing, here’s a list of basic tools to have on hand:
- Nail polish (base, color, and top coat)
- Nail dotting tool or bobby pin
- Striping brush or thin paintbrush
- Nail tape or stickers for clean lines
- Acetone and cotton pads for clean-up
- Optional: Nail stamping kit or fine glitter
2. Easy DIY Nail Art Ideas
Polka Dot Nails
How to do it: Use a dotting tool or the end of a bobby pin to dot a contrasting color on your base coat.
Perfect for: Beginners
Color Block Design
How to do it: Use nail tape or a straight edge to section off parts of the nail. Paint each section a different color.
Perfect for: Modern, geometric looks
Image suggestion: Nails in pastel color blocks with crisp lines.
Ombre or Gradient Nails
How to do it: Dab two or more colors onto a makeup sponge and gently press onto the nail. Blend using top coat.
Perfect for: Trendy or soft fades
Glitter Fade
How to do it: Apply a glitter polish to the tips and gently pull it downward with a brush or sponge.
Perfect for: Special occasions or glam looks
Simple Floral
How to do it: Use a dotting tool to create 5 dots in a circle and one in the center.
Perfect for: Spring, summer, or a feminine touch
3. Pro Tips for Long-Lasting Results
- Always start with a base coat to prevent staining
- Let each layer dry fully before adding another
- Seal your design with a top coat
- Clean around the edges with a small brush dipped in acetone
- Avoid hot water for a few hours after application
4. Nail Art for Different Nail Shapes
| Nail Shape | Design Ideas |
| Round | Minimal dots, simple stripes |
| Square | French tips, color blocks |
| Almond | Ombre, abstract designs |
| Coffin | Glitter fade, gems or rhinestones |
| Stiletto | Bold patterns, metallic finishes |
 Conclusion: Nail Your Style with DIY Designs
With just a few tools and a bit of time, you can create beautiful nail art that reflects your personal style. Whether you’re into subtle designs or bold patterns, DIY nails are a creative, relaxing, and rewarding way to express yourself.
Experiment, have fun, and don’t stress the small smudges—every artist starts somewhere.
.FAQ
Do I need professional tools to start nail art?
Not at all. Household items like bobby pins, tape, and sponges can work just fine.
How long does DIY nail art last?
With proper base and top coats, your designs can last 5–7 days.
Can I do nail art on natural nails?
Yes—just make sure they’re clean, filed, and prepped before painting.
What polish works best for designs?
Look for highly pigmented polishes with good coverage in one coat.


